[PHP言語]カレンダーの作り方を解説[かんたん!]

みなさんこんにちは!ワトスンです。
今回は、、
といった疑問に答えます。
■読んでほしい人
HTML/CSS/PHPの基礎を理解できている方
PHP言語を一通り本などで学習したけど、実際に何か作ったことがない方にカレンダー作成はおすすめです。
是非参考にしてみて下さい。
PHP言語でのカレンダーの作り方手順
さっそく、カレンダーの作り方をご紹介していきたいと思います。
手順は以下の通りです。
1:HTML言語で形を作る
↓
2:CSSでデザインを整える
↓
3:PHP言語でプログラムを組む
と言った感じです。
それぞれの手順について詳しく解説していきたいと思います。
1:HTML言語で形を作る
まずはHTML言語でカレンダーの形を作ってあげます。
下↓のようなコードを書いていきます。
|
1 2 3 4 5 6 7 8 9 10 11 12 13 14 15 16 17 18 19 20 21 22 23 24 25 26 27 28 29 30 31 32 33 34 35 36 37 38 39 40 41 42 43 44 45 46 47 48 49 50 51 52 |
<!DOCTYPE html> <html lang="ja"> <head> <meta charset="utf-8"> <title>PHPカレンダー</title> </head> <body> <div class="container"> <h3><a href="?ym=<?php echo $prev; ?>"><</a><?php echo $html_title; ?><a href="?ym=<?php echo $next; ?>">></a></h3> <table class="table table-bordered"> <tr> <th>日</th> <th>月</th> <th>火</th> <th>水</th> <th>木</th> <th>金</th> <th>土</th> </tr> <tr> <td></td> //空白 <td></td> <td>1</td> ~~~ <td>5</td> </tr> <tr> <td>6</td> ~~~ <td>12</td> </tr> <tr> <td>13</td> ~~~ <td>19</td> </tr> <tr> <td>20</td> ~~~ <td>26</td> </tr> <tr> <td>27</td> ~~~ <td>31</td> <td></td> <td></td> </tr> </table> </div> </body> </html> |
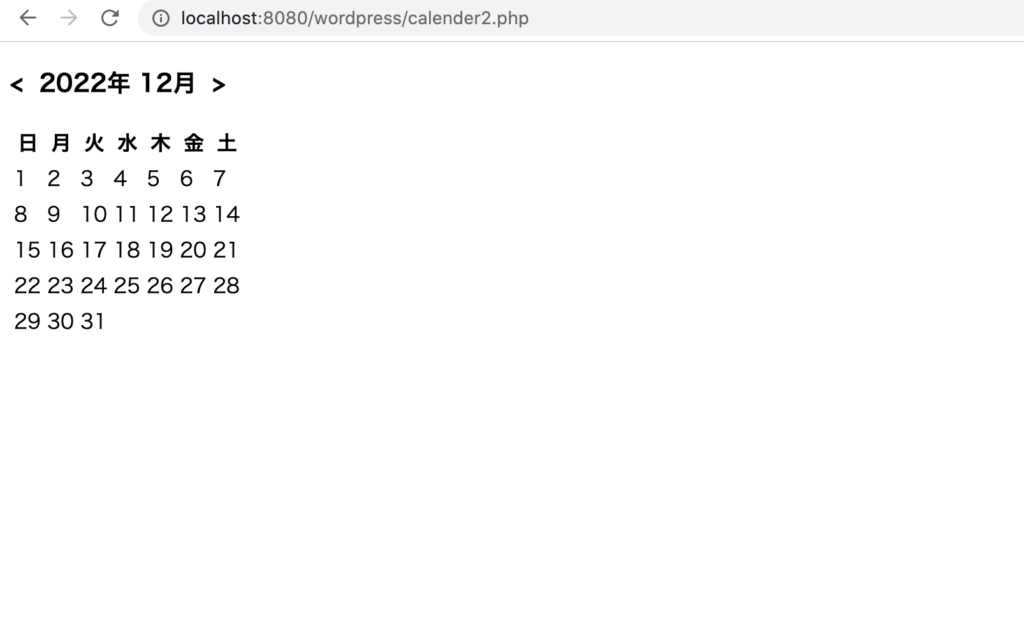
この時点では画像のような状態になります。

軽くデザインを整えてあげる必要があります。
CSSでデザイン調整していきましょう。
2:CSSでデザインを整える
先ほど作成したHTMLの<head></head>の中にスタイルシートを追加します。
|
1 2 3 4 5 6 7 8 9 10 11 12 13 14 15 16 17 18 19 20 21 22 23 24 25 26 27 |
<link rel="stylesheet" href="https://maxcdn.bootstrapcdn.com/bootstrap/3.3.7/css/bootstrap.min.css" integrity="sha384-BVYiiSIFeK1dGmJRAkycuHAHRg32OmUcww7on3RYdg4Va+PmSTsz/K68vbdEjh4u" crossorigin="anonymous"> <link href="https://fonts.googleapis.com/css?family=Noto+Sans" rel="stylesheet"> <style> .container { font-family: 'Noto Sans', sans-serif; /*--GoogleFontsを使用--*/ margin-top: 80px; } h3 { margin-bottom: 30px; } th { height: 30px; text-align: center; } td { height: 100px; } .today { background: orange; /*--日付が今日の場合は背景オレンジ--*/ } th:nth-of-type(1), td:nth-of-type(1) { /*--日曜日は赤--*/ color: red; } th:nth-of-type(7), td:nth-of-type(7) { /*--土曜日は青--*/ color: blue; } </style> |
デザインはご自身の好みでいいと思いますが、今回はBootstrapとGoogleFontを使用して簡単に仕上げました。
BootstrapとGoogleFontsを利用するためのlinkも追加しました。
Bootstrapの使い方を詳しく知りたい方は、「Bootstrapの使い方」をご覧下さい。
GoogleFontsの使い方を詳しく知りたい方は、「GoogleFontsの使い方」をご覧下さい。
3:PHP言語でプログラムを組む
最後にPHP言語を用いて年月の切り替えができるようにしていきます。
プログラムは以下の通りです。
|
1 2 3 4 5 6 7 8 9 10 11 12 13 14 15 16 17 18 19 20 21 22 23 24 25 26 27 28 29 30 31 32 33 34 35 36 37 38 39 40 41 42 43 44 45 46 47 48 49 50 51 52 53 54 55 56 57 58 59 60 61 62 63 64 65 66 67 68 69 70 71 72 73 |
<?php //タイムゾーンを設定 date_default_timezone_set('Asia/Tokyo'); //前月・次月リンクが選択された場合は、GETパラメーターから年月を取得 if(isset($_GET['ym'])){ $ym = $_GET['ym']; }else{ //今月の年月を表示 $ym = date('Y-m'); } //タイムスタンプ(どの時刻を基準にするか)を作成し、フォーマットをチェックする //strtotime('Y-m-01') $timestamp = strtotime($ym . '-01'); if($timestamp === false){//エラー対策として形式チェックを追加 //falseが返ってきた時は、現在の年月・タイムスタンプを取得 $ym = date('Y-m'); $timestamp = strtotime($ym . '-01'); } //今月の日付 フォーマット 例)2020-10-2 $today = date('Y-m-j'); //カレンダーのタイトルを作成 例)2020年10月 $html_title = date('Y年n月', $timestamp);//date(表示する内容,基準) //前月・次月の年月を取得 //strtotime(,基準) $prev = date('Y-m', strtotime('-1 month', $timestamp)); $next = date('Y-m', strtotime('+1 month', $timestamp)); //該当月の日数を取得 $day_count = date('t', $timestamp); //1日が何曜日か $youbi = date('w', $timestamp); //カレンダー作成の準備 $weeks = []; $week = ''; //第1週目:空のセルを追加 //str_repeat(文字列, 反復回数) $week .= str_repeat('<td></td>', $youbi); for($day = 1; $day <= $day_count; $day++, $youbi++){ $date = $ym . '-' . $day; //2020-00-00 if($today == $date){ $week .= '<td class="today">' . $day;//今日の場合はclassにtodayをつける } else { $week .= '<td>' . $day; } $week .= '</td>'; if($youbi % 7 == 6 || $day == $day_count){//週終わり、月終わりの場合 //%は余りを求める、||はまたは //土曜日を取得 if($day == $day_count){//月の最終日、空セルを追加 $week .= str_repeat('<td></td>', 6 - ($youbi % 7)); } $weeks[] = '<tr>' . $week . '</tr>'; //weeks配列にtrと$weekを追加 $week = '';//weekをリセット } } ?> |
ここまで来たら一度動作を確認してみて下さい。
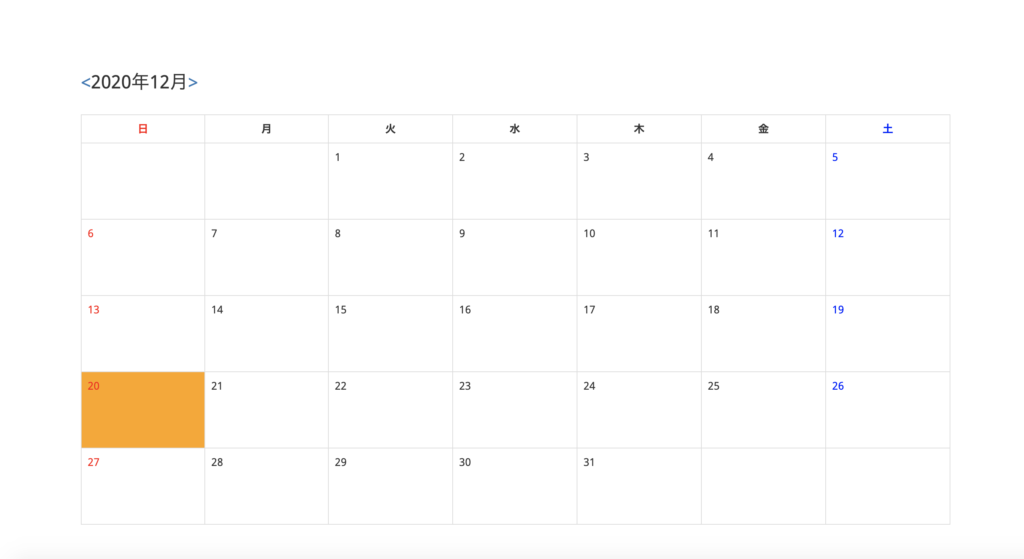
上手くいっていると思います。
PHPカレンダー完成形

ここでこれまでのコードをまとめたものを提示しておきますので、コピペでもできるようになっています。
|
1 2 3 4 5 6 7 8 9 10 11 12 13 14 15 16 17 18 19 20 21 22 23 24 25 26 27 28 29 30 31 32 33 34 35 36 37 38 39 40 41 42 43 44 45 46 47 48 49 50 51 52 53 54 55 56 57 58 59 60 61 62 63 64 65 66 67 68 69 70 71 72 73 74 75 76 77 78 79 80 81 82 83 84 85 86 87 88 89 90 91 92 93 94 95 96 97 98 99 100 101 102 103 104 105 106 107 108 109 110 111 112 113 114 115 116 117 118 119 120 121 122 123 124 125 126 127 128 129 130 131 |
<?php //タイムゾーンを設定 date_default_timezone_set('Asia/Tokyo'); //前月・次月リンクが選択された場合は、GETパラメーターから年月を取得 if(isset($_GET['ym'])){ $ym = $_GET['ym']; }else{ //今月の年月を表示 $ym = date('Y-m'); } //タイムスタンプ(どの時刻を基準にするか)を作成し、フォーマットをチェックする //strtotime('Y-m-01') $timestamp = strtotime($ym . '-01'); if($timestamp === false){//エラー対策として形式チェックを追加 //falseが返ってきた時は、現在の年月・タイムスタンプを取得 $ym = date('Y-m'); $timestamp = strtotime($ym . '-01'); } //今月の日付 フォーマット 例)2020-10-2 $today = date('Y-m-j'); //カレンダーのタイトルを作成 例)2020年10月 $html_title = date('Y年n月', $timestamp);//date(表示する内容,基準) //前月・次月の年月を取得 //strtotime(,基準) $prev = date('Y-m', strtotime('-1 month', $timestamp)); $next = date('Y-m', strtotime('+1 month', $timestamp)); //該当月の日数を取得 $day_count = date('t', $timestamp); //1日が何曜日か $youbi = date('w', $timestamp); //カレンダー作成の準備 $weeks = []; $week = ''; //第1週目:空のセルを追加 //str_repeat(文字列, 反復回数) $week .= str_repeat('<td></td>', $youbi); for($day = 1; $day <= $day_count; $day++, $youbi++){ $date = $ym . '-' . $day; //2020-00-00 if($today == $date){ $week .= '<td class="today">' . $day;//今日の場合はclassにtodayをつける } else { $week .= '<td>' . $day; } $week .= '</td>'; if($youbi % 7 == 6 || $day == $day_count){//週終わり、月終わりの場合 //%は余りを求める、||はまたは //土曜日を取得 if($day == $day_count){//月の最終日、空セルを追加 $week .= str_repeat('<td></td>', 6 - ($youbi % 7)); } $weeks[] = '<tr>' . $week . '</tr>'; //weeks配列にtrと$weekを追加 $week = '';//weekをリセット } } ?> <!DOCTYPE html> <html lang="ja"> <head> <meta charset="utf-8"> <title>PHPカレンダー</title> <link rel="stylesheet" href="https://maxcdn.bootstrapcdn.com/bootstrap/3.3.7/css/bootstrap.min.css" integrity="sha384-BVYiiSIFeK1dGmJRAkycuHAHRg32OmUcww7on3RYdg4Va+PmSTsz/K68vbdEjh4u" crossorigin="anonymous"> <link href="https://fonts.googleapis.com/css?family=Noto+Sans" rel="stylesheet"> <style> .container { font-family: 'Noto Sans', sans-serif; /*--GoogleFontsを使用--*/ margin-top: 80px; } h3 { margin-bottom: 30px; } th { height: 30px; text-align: center; } td { height: 100px; } .today { background: orange; /*--日付が今日の場合は背景オレンジ--*/ } th:nth-of-type(1), td:nth-of-type(1) { /*--日曜日は赤--*/ color: red; } th:nth-of-type(7), td:nth-of-type(7) { /*--土曜日は青--*/ color: blue; } </style> </head> <body> <div class="container"> <h3><a href="?ym=<?php echo $prev; ?>"><</a><?php echo $html_title; ?><a href="?ym=<?php echo $next; ?>">></a></h3> <table class="table table-bordered"> <tr> <th>日</th> <th>月</th> <th>火</th> <th>水</th> <th>木</th> <th>金</th> <th>土</th> </tr> <?php foreach ($weeks as $week) { echo $week; } ?> </table> </div> </body> </html> |
わからない箇所は、できるだけ自分で考えて作成していくことでプログラミングが上達していきます。
これらのコードは「PHPカレンダーの作り方」を参考にさせて頂いたものです。
私なりにさらに細かくそれぞれの箇所についてコメントしていますので参考にしてみてください。
初心者の方でも理解できるかなと思います。
カレンダーの作り方が理解できた方は、次はPHP言語で予約機能を追加してみましょう!
このようにできることを徐々に増やしていくことがプログラミング上達の近道です。
なにか疑問点がありましたらコメントまたはTwitterのDMでご連絡ください!
以上です。


1 件の投稿